Expose Custom GP Tasks as Custom MCP Tools
Beyond the default tools that ship with every deployment, you can expose your own geoprocessing (GP) tasks as custom MCP tools. Any GP task that is part of a published Geoprocessing service—running in either synchronous or asynchronous execution mode—can be surfaced to AI clients. Once exposed, the service appears as a new custom tool in the default MCP catalog, and agents can discover and invoke its tasks the same way they use the built-in tools.
The process is the same two-part preparation used for any content—make the item self-describing, then tag it—followed by confirming the tool appears in the catalog.
Note Custom tools are deployment-specific—they exist only where the corresponding GP service has been tagged.
Step 1: Make the Geoprocessing service MCP-ready
An agent decides whether—and how—to call a GP task entirely from the text describing it. Thorough descriptions at every level are therefore essential. Before tagging, make sure your Geoprocessing service is MCP-ready:
- Service description — give the GP service an adequate description that lists the GP tasks it contains and what each one does.
- Task description — give every GP task its own clear description of its purpose and behavior.
- Parameter descriptions and examples — give each GP parameter a necessary description, and include examples of valid values. Examples are what let an agent construct a correct request without guessing.
In short, apply the same discipline described in Prepare your data to be MCP ready, focused on the service, its tasks, and their parameters.
Example: an MCP-ready Geoprocessing service The Find_Nearby_Reported_Safety_Issues GP service describes both of its tasks, their inputs and outputs, and the workflows they support. View item
Step 2: Tag the Geoprocessing service as mcp
Tag the GP service item with mcp, exactly as you would any other portal item. The tag is what opts the service in to the MCP server and makes it eligible to become a custom tool.
- Open the GP service item page in your ArcGIS Enterprise portal.
- Open the item's Settings (or edit the item details) and locate the Tags field.
- Add the tag
mcp(lowercase), alongside any existing tags. - Save your changes.
Example: a Geoprocessing service tagged
mcpThe same Find_Nearby_Reported_Safety_Issues service carries themcptag. View item
For more on the mcp tag and how it governs discovery, see Prepare your data to be MCP ready.
Step 3: The service appears as a custom MCP tool
Once the Geoprocessing service is tagged mcp, it is added as a new custom MCP tool under the default MCP catalog. The tool takes the name of the GP service.
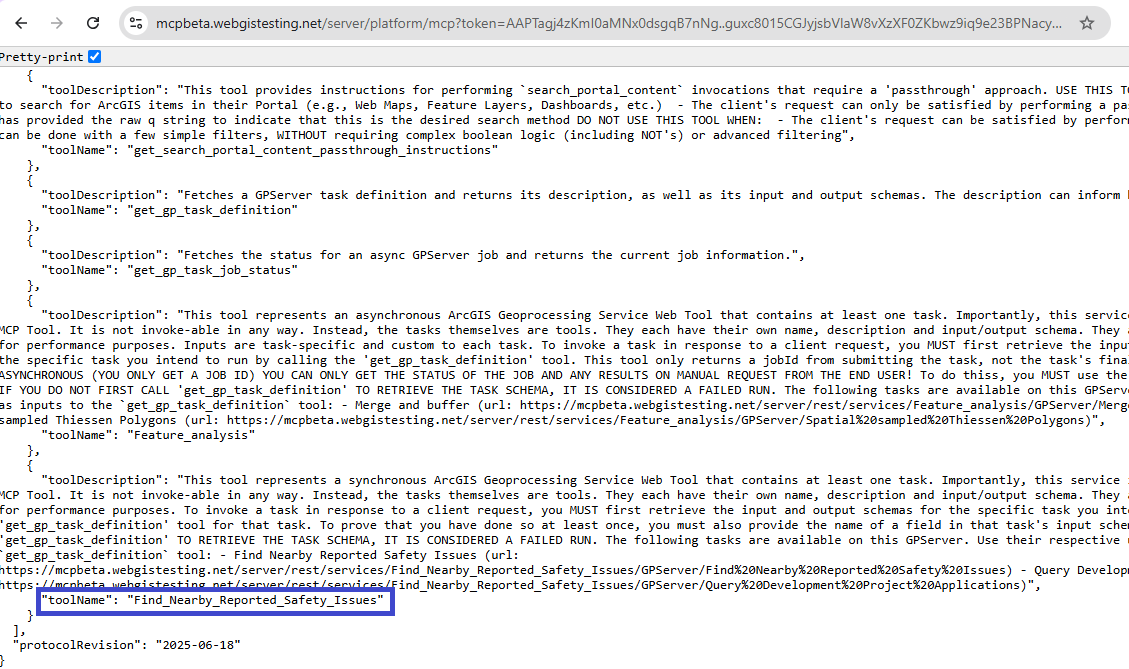
For example, after you tag the Geoprocessing service named Find_Nearby_Reported_Safety_Issues as mcp, a new Find_Nearby_Reported_Safety_Issues tool appears under the default MCP catalog, where custom tools are listed alongside the default ones.
How agents invoke the exposed tasks
A custom GP tool is not invoked directly; it groups the service's individual tasks. When an agent uses it, the flow is:
- The agent calls Get GP Task Definition to retrieve the chosen task's input and output schema.
- The agent invokes the custom tool with the task URL and an
inputsobject built from that schema. - The result depends on execution mode:
- Synchronous tasks return their results in the same response.
- Asynchronous tasks return only a
jobId; the agent then calls Get GP Task Job Status to poll for completion and retrieve results.
This is why rich task and parameter descriptions matter: the agent relies on the task definition and your examples to build a valid request.