Apply the MCP Overlay
The MCP overlay adds the platform catalogs web application—arcgis#platform—to your ArcGIS Hosting Server. Deploying it stands up the /platform context that serves the MCP catalog. This page explains how to download the overlay and deploy it, either with the provided installation scripts or manually, and how to confirm the overlay is applied successfully.
Important: deploy on the ArcGIS hosting server only
The MCP overlay must be applied to your deployment's ArcGIS hosting server—the GIS Server site that is registered as the portal's hosting server. Installing the overlay on any other server role—for example, a federated GIS Server, a dedicated-role server such as an image or GeoAnalytics server, or a stand-alone (unfederated) site—will not work, and the MCP catalog will not come online. Run every step below on the hosting server.
Important: Applying the overlay writes files under the ArcGIS Server installation directory and restarts the ArcGIS Server service. Perform these steps during a maintenance window, with an account that has administrative privileges on the server machine.
Download the latest overlay
The overlay is distributed as three separate files. Download the overlay package plus the installation script for your platform (Windows / Linux) — each link below downloads a single file:
arcgis_mcp.zip— the overlay package. It contains version-specific builds of thearcgis#platformweb application plus a shared Tomcat context descriptor:
text
  arcgis_mcp.zip
  ├── arcgis#platform.xml        # context descriptor — shared by all versions, at the root
  ├── v9_11/arcgis#platform/     # web-app build for ArcGIS Server 11.1
  ├── v9_17/arcgis#platform/     # web-app build for ArcGIS Server 11.3
  └── v10_17/arcgis#platform/    # web-app build for ArcGIS Server 11.5, 12.0, 12.1
The # character is Tomcat's path separator, so arcgis#platform maps to the URL context /arcgis/platform.
-
install_overlay.ps1— a PowerShell script that deploys the overlay on Windows. -
install_overlay.sh— a shell script that deploys the overlay on Linux.
Keep whichever installation script you use in the same folder as arcgis_mcp.zip; each script expects to find the archive beside itself.
Choose the build for your ArcGIS Server version
arcgis_mcp.zip carries three web-app builds. The installation scripts detect your installed ArcGIS Server version and select the matching build automatically; for a manual deployment you choose it yourself using this mapping:
| ArcGIS Server version | Build folder inside arcgis_mcp.zip |
|---|---|
| 11.1 | v9_11/arcgis#platform |
| 11.3 | v9_17/arcgis#platform |
| 11.5, 12.0, 12.1 | v10_17/arcgis#platform |
The arcgis#platform.xml context descriptor at the root of the package is the same for every version.
Note: The overlay supports ArcGIS Server 11.1, 11.3, 11.5, 12.0, and 12.1. The installation scripts detect the installed version and stop if it is not one of these.
Deploy the overlay using the installation script
The installation script detects your installed ArcGIS Server version, extracts the package, selects the matching web-app build, copies it and the shared context descriptor into the correct Tomcat locations, and restarts the service—all in one pass. No version parameter is required—the scripts automatically detect the installed version.
Windows
Copy arcgis_mcp.zip and install_overlay.ps1 into the same folder—one you have write permission to—on the ArcGIS Server machine. Open an elevated PowerShell session (Run as Administrator)—elevation is required because the script writes under the install directory and restarts a Windows service—and run the script from that folder. No parameters are needed; it detects the installed ArcGIS Server version automatically:
.\install_overlay.ps1
The script prints progress as it runs—the detected version, the resolved install directory, the extraction folder, each deployed artifact, and the service restart—and waits for the ArcGIS Server service to report Running before finishing.
PowerShell execution policy. install_overlay.ps1 is not digitally signed, so depending on your machine's PowerShell execution policy—or because the file was downloaded from the internet and blocked—PowerShell may refuse to run it. If that happens, use one of the following options:
# Option A: Allow scripts for just this session, then run
Set-ExecutionPolicy -Scope Process -ExecutionPolicy Bypass -Force
.\install_overlay.ps1

# Option B: invoke it directly with a bypass
powershell.exe -ExecutionPolicy Bypass -File .\install_overlay.ps1
Tip: If the script reports that it cannot find the package, confirm
arcgis_mcp.zipis in the same folder asinstall_overlay.ps1. If it reports a version error, your installed ArcGIS Server version is not one of the supported versions (11.1, 11.3, 11.5, 12.0, 12.1).
What the script does, in order:
- Reads the installed ArcGIS Server version and install directory from the registry, and stops if the version is not one of the supported versions (11.1, 11.3, 11.5, 12.0, 12.1).
- Extracts
arcgis_mcp.zipto a temporary folder. - Automatically selects the matching build—
v9_11for 11.1,v9_17for 11.3,v10_17for 11.5/12.0/12.1—from the detected version. - Copies that build's
arcgis#platformfolder into<InstallDir>\framework\webapps. - Copies the shared
arcgis#platform.xmlcontext descriptor into<InstallDir>\framework\runtime\tomcat\conf\Catalina\localhost. - Restarts the ArcGIS Server Windows service so Tomcat picks up the new context.
Linux
Prerequisite:
unzippackage must be configured on the machine which is used by the script to extract the package.
Copy arcgis_mcp.zip and install_overlay.sh into the same folder—one you have write permission to—on the ArcGIS Server machine, make the script executable, and run it with sudo. No version parameter is needed; it detects the installed ArcGIS Server version automatically. Elevation is required because the ArcGIS Server install is owned by the arcgis account, so reading its properties and writing under framework/ needs root:
chmod +x install_overlay.sh
sudo ./install_overlay.sh
The script prints progress as it runs and restarts ArcGIS Server when finished. It takes one optional flag, -u <username>—the ArcGIS Server account that owns the install (default arcgis). If ArcGIS Server runs under a different account, pass it (and run ./install_overlay.sh -h to print usage):
sudo ./install_overlay.sh -u arcgisadmin
Important: use the same account ArcGIS Server was installed with
The
-uaccount must be the same operating-system user that ArcGIS Server was installed and runs under (the default isarcgis). The script reads that account's ESRI properties file to locate the install and assigns ownership of the deployed files to it, so that Tomcat—running as that account—can read them. If ArcGIS Server was installed under a different user, pass it with-u <username>. Using the wrong account leads to "properties file not found" errors or file-permission issues after deployment.Tip: If the script reports a version error, your installed ArcGIS Server version is not one of the supported versions (11.1, 11.3, 11.5, 12.0, 12.1).
What the script does, in order:
- Reads the installed ArcGIS Server version and install directory from the ESRI properties file in the ArcGIS Server account's home directory, and stops if the version is not one of the supported versions (11.1, 11.3, 11.5, 12.0, 12.1).
- Extracts
arcgis_mcp.zipto a temporary folder. - Automatically selects the matching build—
v9_11for 11.1,v9_17for 11.3,v10_17for 11.5/12.0/12.1—from the detected version. - Copies that build's
arcgis#platformfolder into<InstallDir>/framework/webappsand sets ownership to the ArcGIS Server account. - Copies the shared
arcgis#platform.xmlcontext descriptor into<InstallDir>/framework/runtime/tomcat/conf/Catalina/localhost. - Adds a
/platform/*URL mapping to the ArcGIS Web Adaptor'sweb.xmlso the context is reachable through the Web Adaptor. This is a best-effort step—it auto-discovers the Web Adaptor's Tomcat, backs upweb.xmlfirst, and if the Web Adaptor's Tomcat orweb.xmlcannot be found it logs a warning and continues without aborting. - Restarts ArcGIS Server using its
stopserver.sh/startserver.shscripts, falling back to thearcgisserversystemd service.
Deploy the overlay manually
If you prefer not to run the installation scripts, you can deploy the overlay by hand. Which web-app build you copy depends on your ArcGIS Server version (see Choose the build for your ArcGIS Server version); the context descriptor is the same for every version. The destination paths are the same relative to the ArcGIS Server installation directory on both Windows and Linux.
-
Stop the ArcGIS Server service. On Windows, stop the ArcGIS Server service from Services (or run
Stop-Service -Name 'ArcGIS Server'in an elevated PowerShell session). On Linux, run thestopserver.shscript in the server's install directory. -
Extract
arcgis_mcp.zipto a temporary location. It contains the shared context descriptorarcgis#platform.xmlat the root, plus three build folders:v9_11/arcgis#platform/(for ArcGIS Server 11.1),v9_17/arcgis#platform/(for 11.3), andv10_17/arcgis#platform/(for 11.5, 12.0, and 12.1). -
Copy the build that matches your ArcGIS Server version into the
webappsfolder under your install directory,<ArcGIS Server install directory>/framework/webapps/— copyv9_11/arcgis#platformfor 11.1,v9_17/arcgis#platformfor 11.3, orv10_17/arcgis#platformfor 11.5 / 12.0 / 12.1. Copy only thearcgis#platformfolder itself, not its version parent folder. If a previousarcgis#platformfolder already exists there, delete it first so the copy is clean. -
Copy the shared context descriptor
arcgis#platform.xml(from the root of the package) into Tomcat'sCatalina/localhostfolder under your install directory,<ArcGIS Server install directory>/framework/runtime/tomcat/conf/Catalina/localhost/. If a previousarcgis#platform.xmlfile already exists there, delete it first so the copy is clean. -
Java Web Adaptor - If you have configured Java based ArcGIS Web Adaptor (the Java Web Adaptor, typical on Linux), add a
<url-pattern>/platform/*</url-pattern>entry to theagswebadaptor<servlet-mapping>in the Web Adaptor'swebapps/server/WEB-INF/web.xml, otherwise the platform context will not be reachable through the Web Adaptor. The Linux installation script performs this step automatically. The IIS Web Adaptor on Windows forwards all paths and requires no such change. -
Start the ArcGIS Server service again — on Windows start the ArcGIS Server service (or run
Start-Service -Name 'ArcGIS Server'); on Linux run thestartserver.shscript in the server's install directory. On startup, Tomcat reads the context descriptor and deploys thearcgis#platformweb application at the/arcgis/platformcontext. Allow a few minutes after the service reports running for the context to come fully online.
Note: On Windows the paths above use backslashes (for example,
…\framework\webapps). The folder and file namesarcgis#platformandarcgis#platform.xml—including the#—must be preserved exactly, because Tomcat relies on the#to form the/arcgis/platformcontext path. On Linux, make sure the copied files are owned by the ArcGIS Server account (for example,arcgis) so Tomcat can read them.
Verify the overlay is deployed correctly
After the service has restarted, wait for ArcGIS Server to be up and running (it may take a few minutes depending on your environment), then confirm the platform catalogs page is being served. Open the following URL in a browser, substituting your own values:
https://<sitedomain>/<Web Adaptor name or context name>/platform
<sitedomain>is your server or web adaptor host—for example,mcpbeta.webgistesting.net.<Web Adaptor name or context name>is the context the overlay is reached through—for example,server.
A correct deployment returns the ArcGIS Enterprise Platform Catalogs HTML page. It shows the heading ArcGIS Enterprise Platform Catalogs, MCP and STAC navigation links, and the description:
The platform catalogs server provides access to ArcGIS Enterprise platform capabilities as catalogs. Currently supported catalogs include MCP and STAC. Please use the links above to navigate to the respective catalogs.
For example, on the sample deployment the page looks like this:
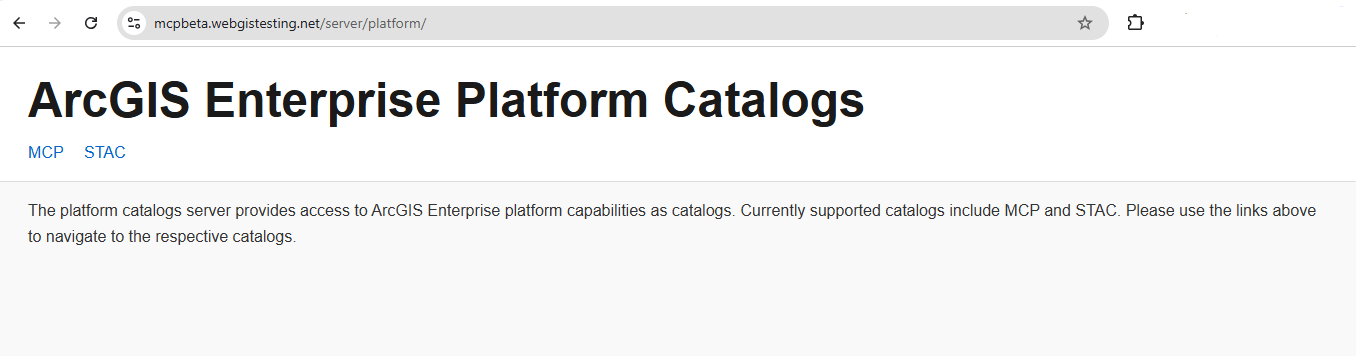
If you see this page, the overlay is deployed and you can continue to Get Started - Supported Authentication Techniques to understand supported authentication techniques.
If you get a 404 or the page does not load, the overlay probably did not deploy properly. Re-check that both artifacts landed in the correct folders, that their names (with the #) are intact, that the correct URL pattern was added to Tomcat for the Java Web Adaptor, and that the ArcGIS Server service fully restarted. For deeper diagnosis, check the ArcGIS Server logs—see Troubleshoot MCP Using ArcGIS Server Logs. If you want to remove the deployed overlay for any reason, refer to Remove the MCP Overlay.
If you still need any help, submit your feedback on the Early Adopter Community (EAC) forum.